Winter Camping

I don’t winter camp. I love the idea in theory but in practice the long hours of darkness cooped up inside a tent just put me off it. Get me a hut with a woodburning stove and I’ll walk/ski/snowshoe miles back to it.

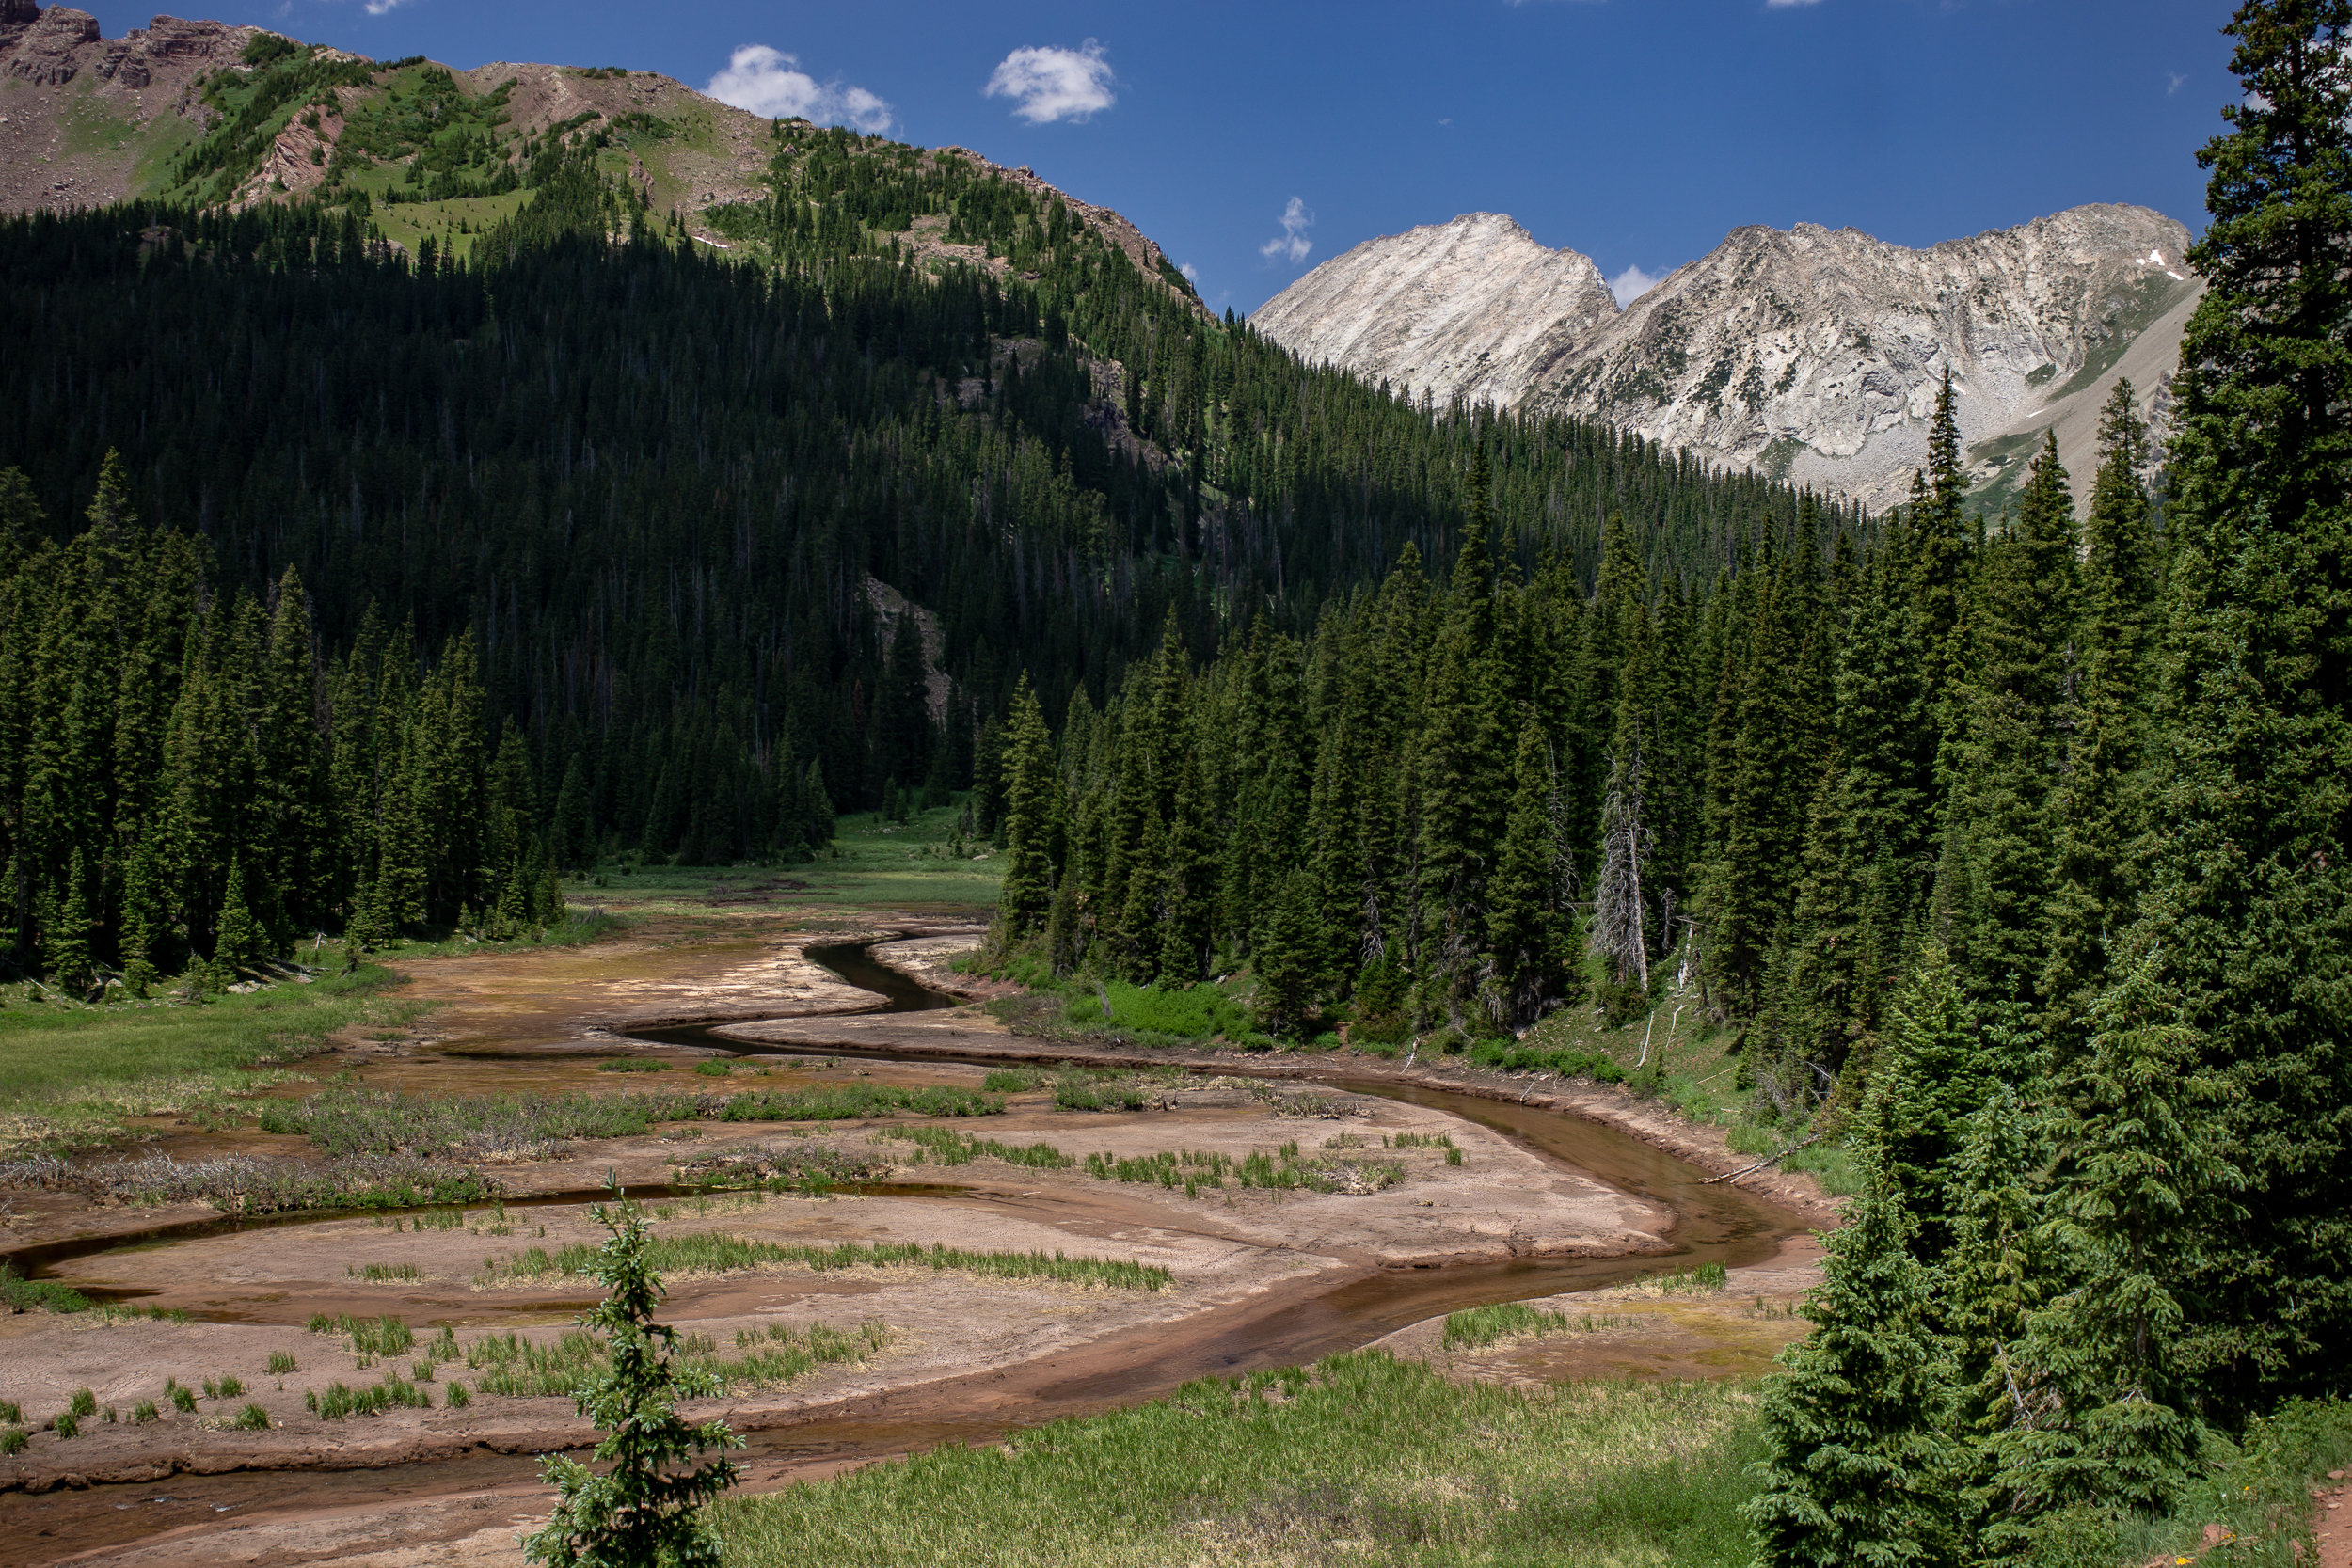
Living this close to the mountains it kills me that prime backpacking season is 3, maybe 4 months max. After a few weeks of coaxing I finally convinced K that we should try it. She’s from the desert, this is probably the last thing she ever saw herself doing.

Winter Camping-3693.jpg
Winter Camping-3702.jpg

At the Moffat Tunnel trailhead , the gateway to the James Peak Wilderness, there are some camping options within a mile of the trailhead. Seems reasonable, close enough to escape if we can’t handle it but far enough away to make it feel worth it.

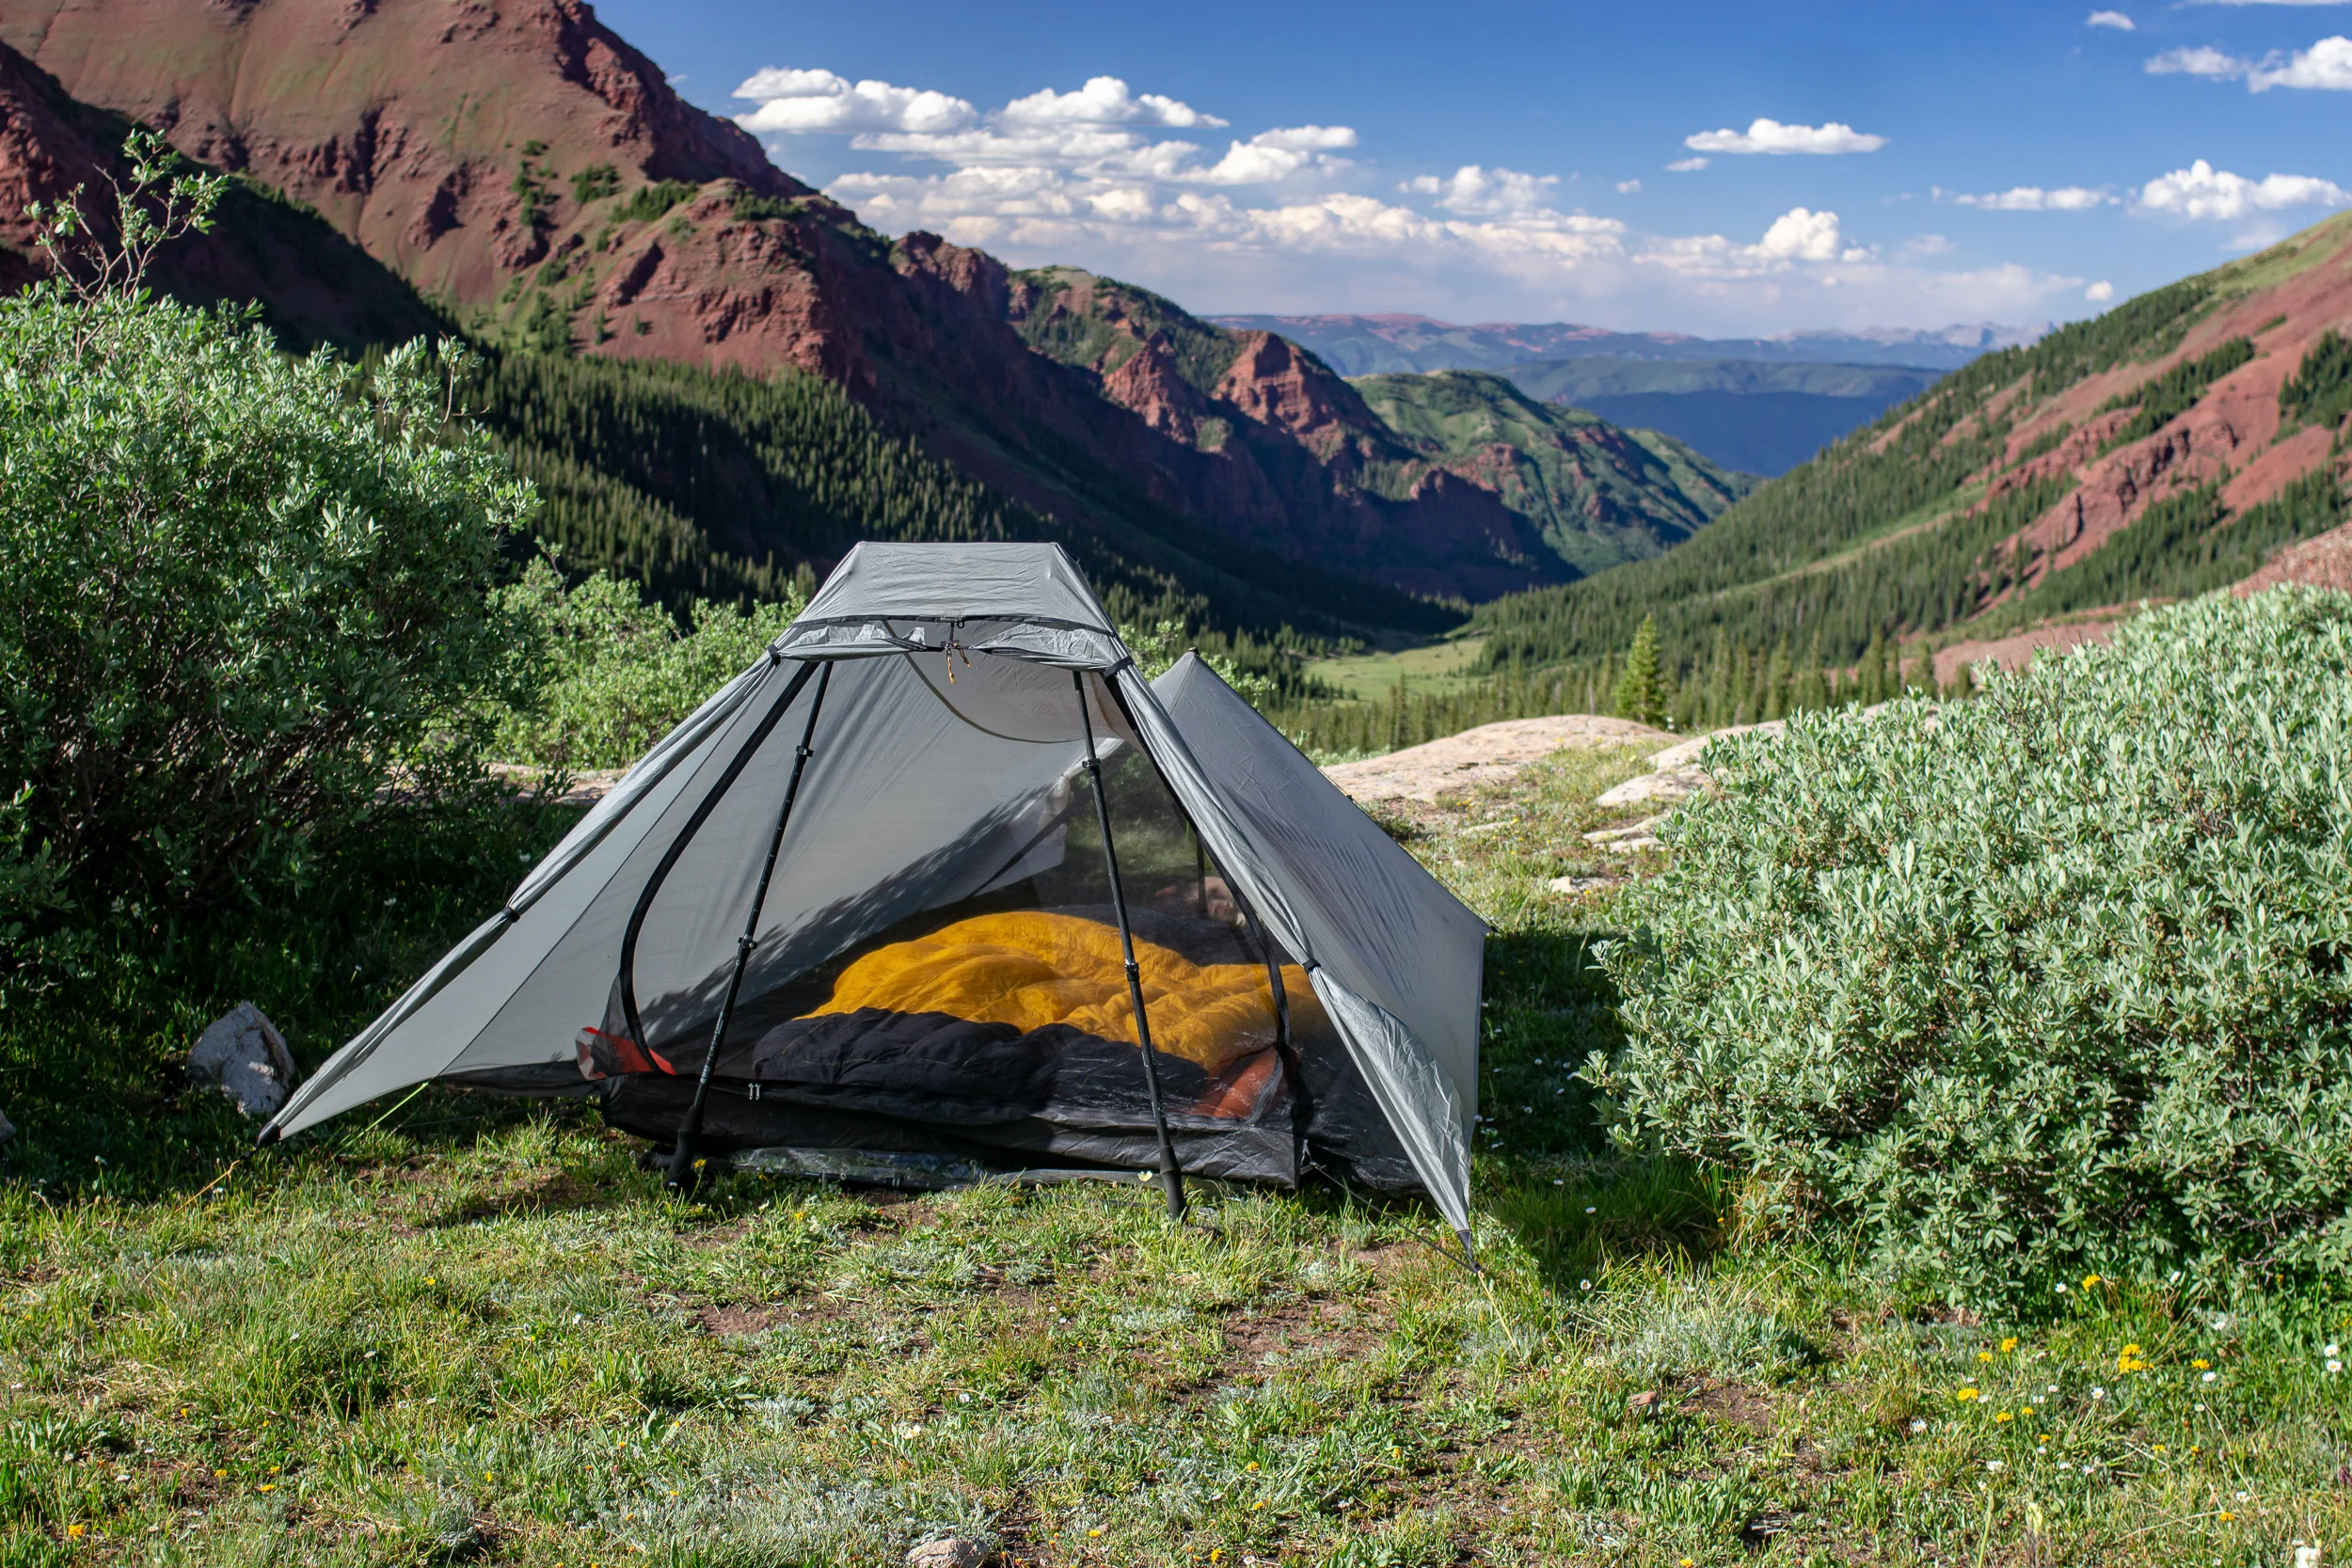
We headed in midday and found a nice spot between some pines and packed down a nice spot for the tent. After everything was all set up we snowshoed around the area and found a side trail leading up to a frozen waterfall.

About 4pm the sun set in our little valley and we got into the tent. Only 15 hours until the next ray of light…

The temps dropped to the teens and the wind howled through the trees but we stayed nice and cozy in the tent armed with books, crosswords and some warming stout.

I’d do it again, but I think I’d still take the hut and woodburning stove.

If you go:

Winter Camping-3709.jpg

Thanksgiving Hut Adventure

It takes a special friend to forgo family and be willing to travel over Thanksgiving weekend. Luckily I have one of those friends. In short, our phone call goes like this:

Me: “Hey”

Him: “Hey”

Me: “I have a kinda crazy plan for Thanksgiving...”

Him: “I’m in!”

2018-11 Thanksgiving Hut-03624.jpg
2018-11 Thanksgiving Hut-03678.jpg

The plan? Rent a backcountry hut, fill it with friends, build a pulk and lug up a turkey + all the fixings for Thanksgiving. Ok, maybe not that crazy, but certainly fun.

He’s not lying, he books tickets from Seattle to Denver shortly after our phone call. After looking through the huts we settle on Jackal Hut, part of the 10th Mountain Hut system. Not too far from the front range and close to Vail where about half of our guests live (this will end up being very fortuitous, but I’ll get to that later).

2018-11 Thanksgiving-1547.jpg
2018-11 Thanksgiving-1544.jpg

The hut is only 3 miles from where we park but it climbs 2,400ft. We’re fully loaded and then some. I have snowshoes & skis on my pack and then the pulk which has 2 12lb turkeys, 2 pies, various bottles and bladders of wine and who knows what else. Halfway up, when I’m seriously regretting my offer to haul all this up, I do a mental approximation of the weight in the pulk - 50 lbs at least.

The first half of the way up has patchy snow and mud (makes the pulk pulling almost impossible), thankfully the second half is snow covered and much better (though still insanely steep). We make it up to the hut around 3pm, exhausted, but in good spirits. Time to get this turkey cooking and the bread proofing.

2018-11 Thanksgiving-1553.jpg

Getting the woodburning oven up to a good heat works surprisingly well. I’m nervous that actually cooking the turkey for 3 hours won't be so easy… it turns out to be a little finicky but the turkey comes out looking awesome (no one took a picture, wtf). The bread also comes out nice after rising for a few hours. The rest of the crew chips in and makes green beans, mac and cheese, potatoes, stuffing, cranberries and gravy. After stuffing ourselves and downing a few glasses of my Seattle friend’s home-made wine we all agree that persevering to get all this up here was worth it. Now we have to eat more so I don’t have to carry it down!

2018-11 Thanksgiving Hut-03637.jpg
2018-11 Thanksgiving Hut-03645.jpg
2018-11 Thanksgiving Hut-03659.jpg

Day 2 brings another 3 guests, 6” of snow, skiing and turkey #2. This one has been precooked and smoked and requires much less effort but tastes amazing, especially with all the leftovers from the night before.

2018-11 Thanksgiving Hut-03692.jpg
2018-11 Thanksgiving Hut-03628.jpg
2018-11 Thanksgiving Hut-03698.jpg

Day 3 it’s still snowing. After skiing and lazing around the hut we descend down to the cars (it takes less than ½ the time it took to get up). There is about a foot of snow on the cars and the snow is flying horizontally. The road back to the highway is flat and even with the low visibility I don’t think too much of the snow, until we get to the highway. The plows have been busy… plowing us in behind a 4 foot high wall of snow, ice and grit. I should have known better, but that’s irrelevant now. After using snowshoes and hands to shovel a hole for the car to fit through I back up and get ready to gun it through (again no pictures, sorry!). My friends are ready to push from behind to get me over the hump if need be (it was needed). I make it over and we slowly crawl on the highway back towards I-70. Cars are in the ditch all over the place and the snow keeps getting worse. When we get back in cell range we discover I-70 has been closed. There’s no way I’m turning around and going back over the pass to try to get out (the usual 1.5 hours back to Boulder is estimated at 6 hours).

Thankfully one of our hut crew lives in Minturn (where we are stranded). We head back there and wait until the rest of the group shows up. It’s decided that in exchange for dinner and beers we can all sleep on his floor for the night. Empire Records on Netflix it is, slumber party style!

2018-11 Thanksgiving Hut-03746.jpg
2018-11 Thanksgiving-1573.jpg

Wild Basin Snowshoe

Wild Basin is a great place to hike. It’s close, it’s beautiful, and there are a plethora of trails. In fact it’s been almost exactly a year since last time we were here. Not feeling very motivated to pick a trail ahead of time we did a “let’s start hiking and see where we go” kind of day.

2018-Wild Basin Snowshoe-01322.jpg
2018-Wild Basin Snowshoe-01343.jpg

We started by walking down the road from the trailhead to the Finch Lake Cutoff trail. The first part of this trail only had a few inches of snow. As we went up the snow slowly got deeper. Then, just after 9,000ft, it all of a sudden increased another foot. Definitely time to strap on the snowshoes. Being the first hikers on the trail was magical and we took our time. Once we got to the intersection of the Finch Lake/Pear Lake and Allenspark trail the snow became packed down. We stopped here for lunch and a cup of tea and enjoyed the views towards the continental divide. After we followed the Finch Lake/Pear Lake trail to the Wild Basin trail and back out to the car.

If you go

Twin Sisters Peak

As winter closes in my range of hiking options shrink. Luckily the front range near Boulder stays snow free longer than the mountains farther west. In Rocky Mountain National Park the Twin Sisters Peak Trail is about 7 miles out and back and gets you to 11,427ft. It is straight up and straight back down. There are a few views along the way but it is mostly through the trees until the last half mile.

Twin Sisters Peak-01260.jpg

There was already snow on the trail and there were a couple dicey spots of ice (yep, I left my microspikes in the car…) on the way up but going slow it was doable. Once we got out of the trees the trail was clear. It was blue skies for miles and the views from the top were stunning.

Twin Sisters Peak-01268.jpg
Twin Sisters Peak-01264.jpg

Never Summer Wilderness Weekend

It feels appropriate to ring in the fall equinox in the Never Summer Wilderness. I wasn’t sure what to expect here having not read much about it (and really I shouldn’t be surprised) but, wow, it was an excellent trip. Scenery was top notch, it was only 2 hours from my door to the trailhead for an amazing weekend loop. And the bonus: from Boulder the fastest way is to take the Trail Ridge Road through Rocky Mountain National Park. Not. Bad.

Never Summer Wilderness-01017.jpg

We hit the trail the first day around 11ish (yes we are lazy). From the parking lot the trail skirts the side of the mountain until it intersection with the Bowen Trail, which is also part of the CDT! From here we began to climb up Bowen Gulch. Our total gain was 2,800ft over 8 miles but given the consistent increase it didn’t feel too bad. We split off the CDT onto the Bowen Lake Trail for the last 1.25 mi to get to Bowen Lake, a great place to set up camp and chill for a few hours before sunset. There were a few people around but it really wasn’t busy. The hike up was mostly through the forest, not much for long views but a very pleasant hike, especially with the aspens starting to change. Scenery at the lake opened up a bit and we could see the ridge we were taking the next day.

2018 Never Summer Wilderness-01039.jpg
Never Summer Wilderness-01050.jpg

Day 2 we hit the trail early and got up onto the ridge behind Bowen Lake, the Cascade Mt Trail. The ridge section is about 4 miles and there are amazing views in every direction. And a summit of Cascade and Ruby Mt if you choose to (the trail itself goes just below the summits). The trail is easy to follow, in a few sections it became faint but since we were following a ridge, no problem.

Never Summer Wilderness-01086.jpg
Never Summer Wilderness-01078.jpg
Never Summer Wilderness-01111.jpg

The ridge descends down to Bowen Pass and intersects with the CDT/Bowen Trail. We headed west on the CDT for a ¼ mile before the intersection of the Jack Park (?) trail. There is a small creek here and it provided a sunny spot for lunch. The trail winds up the side of Fairview Mt and after a mile we bore right at another unnamed trail junction. We headed up to the pass between Fairview Mt and Parika Peak getting good views along the way. At the pass we could see down to Parika Lake and the Baker Gulch, our way back to the car. Parika Lake is exposed and would make for a tough camp in windy weather if doing the loop in the other direction. There are more sheltered spots a bit farther down Baker Gulch near an unnamed lake at approx 11,000ft that would make a good camp. The walk out down the valley became mostly wooded and was similar to the Bowen Trail we took up.

Never Summer Wilderness-01171.jpg

Made it back to the car around 4pm, I was tempted to stop in Estes Park but I’m glad I was able to wait another 30 minutes to Lyons where we hit up the Oskar Blues Taphouse for a delicious burger and a beer.

If you go

Mt Bierstadt

My First 14er.

I’m not a peak bagger. I love getting a view but I’d much rather walk a ridgeline than summit something. However, it is rather embarrassing that I’ve lived in Colorado for over a year now and I haven’t hiked a 14er (aka a 14,000 ft mountain).

Mt Bierstadt seemed like a good place to start as it’s considered one of the easier 14ers. We got to the trailhead around 6am and it was already full. It was right around freezing and the boardwalks were slick with frost but once we got moving it was a beautiful clear day for hiking. Little patches of ice crunched under foot where the puddles were the day before.

2018-09-08 Mt Bierstadt-0566.jpg

The trail itself is well trodden and easy going, especially the first mile or so and we made good time. We hit the switchbacks as the sun started peeking over the ridge and then a short section of rock hopping and we were at the top. Snacks and views were consumed. The way down was a breeze. Lots of crowds were heading uphill, glad we got an early start.

2018-09-08 Mt Bierstadt-0612.jpg

The overall elevation gain is ~2,600, which isn’t that different from a lot of day hikes I do but getting up to 14,000ft certainly makes it more challenging. I recorded a trip time of just over 4 hours including a 20 min break at the top, 7.25 miles total.

If you go:

Guanella Pass TH

Trail Map: Caltopo / Gaia

20 Hour Getaway

Its a busy Labor Day weekend for me but I have the itch to camp. 

After shooting photos for a client in the morning i grabb my pack and hastily shove my gear in. Luckily, in the spring I got on kick making a bunch of meals in anticipation of hiking season. I grab one of those and some oats and hop in the car. An hour later I’m at the Moffat Tunnel trailhead ready to hit the trail. The beauty of living in Boulder.

Blog Crater Lakes-0545.jpg

I’ve been to James Peak Wilderness before and I know there are multiple lakes with awesome campsites within 3-4 miles of the trailhead. This time I’m headed to the Crater Lake area, about 3 miles from the car. 

It’s late afternoon by this point and most people I pass are headed back to the trailhead. After 2 miles of steady gradual incline I get to the turn off to crater lakes. From here the trail becomes more steep before eventually flattening out near the lakes.

Unsurprisingly, there is a lot of activity around the lakes. On another weekend it could be a nice place to camp but for tonight I’m going another .5 mile and 400ft up to Upper Crater Lake. 

Blog Crater Lakes-0497.jpg
Blog Crater Lakes-0513.jpg

This is the steepest part of the climb and at lake level it becomes more of a rock hopping experience than actual trail. Not a lot in the way of flat sites but I find a little spot for my tent near the east side of the lake just past the outflow. The bonus is no one else is up here camping. 

By the time I finish dinner it is already fairly dark and the Milky Way is starting to emerge. The job I was working this morning was using a Canon 5DS R with an 16-35mm zoom. Perfect for having a bit of fun messing around with long exposure shots while the sky is still moonless. This is a great camera, it’s completely impractical to bring into backcountry but, hey, what the hell.

Blog Crater Lakes-0469.jpg
Blog Crater Lakes-0460.jpg

The next day I make it out early to get home. From door to door the whole trip was only 20 hours but was a great reset.

If you go:

Capitol Creek Circuit+

Summer is finally here and we’re starting it out with a big trip. The Maroon-Snowmass Wilderness has been on my list of places to check out since moving to Colorado last summer. The issue is it’s also on a lot of other people’s lists too. Solitude in wilderness is what really resets and invigorates me. The super popular 4-pass loop is out. Enter the Capitol Creek Circuit route.

capitolcreekcircuit-00390.jpg

After reading up on the Capitol Creek Circuit there are a lot of things going for it over the 4-pass loop: longer, more elevation, not as busy and “circuit” sounds cooler than “loop”. It’s not as busy as 4-pass but it still is popular (if a route has a name it’s a “thing”, and if it’s a “thing” people will hike it). Which isn’t a bad thing, I’m just a grump.

Route planning is one of my favorite parts of planning a trip, after pouring over the maps and devising no less than 6 ways to do the loop I settled with what I’m calling the “Capitol Creek Circuit+”.

What makes it “+”? 1. It’s longer (+6 miles), it has more elevation (+2,000ft) and has +2 more passes. And it has a bonus side trip. I’m certainly looking forward to all the +’s, K maybe not as much. You can view the route on Caltopo or Gaia.

We’re starting from the Maroon Snowmass trailhead at the base of the Geneva Lake trail. The parking lot is small so plan to arrive early if you go. From here we backtrack a ¼ down the road to the East Maroon Trailhead. We’re choosing to go this way (clockwise) because Willow Lake, our campsite for tonight, is the highest and most exposed of the sites we plan to stay at and the forecast looks clear with little wind.  

100ft up the trail we hear some rustling in the bushes about 20ft off the trail. It’s a bear! It’s sitting on its haunches eating berries facing away from us. It looks over its shoulder at us, stares for a second or two and nonchalantly goes back to the berries. Ok then, I guess we are not a threat.  

capitolcreekcircuit-00448.jpg

The East Maroon trail is a steady, beautiful slog 6.75 miles up to the pass. From the pass, the highest point of our hike at 12,627ft, we can see Willow Lake and the Willow pass we’ll head out on tomorrow. From here it’s only another 1.5 miles down to the lake to camp. We saw one other person on the trail and no one else is camping here tonight. Perfect.

capitolcreekcircuit-00498.jpg

Day 2: We head up the Willow Pass and down to the Maroon Snowmass Trail. Gone is the solutiude, we’re now on the busy 4-pass loop. I shouldn’t be so crabby. The people are all stoked to be up here and there is a reason why this is a popular trail, the scenery is out of this world.

capitolcreekcircuit-00559.jpg

The next pass is Buckskin (again, amazing) and after we head down hill to Snowmass Lake, about 3.5 miles from the pass. It’s early afternoon, we had thought about pushing on to Geneva Lake but it’s just too nice here and there are still tons of good tent spots left. Plus we’re not on a tight timeline so why push it. Being on the 4-pass loop the campground fills up by late afternoon and it’s a bit of a zoo, but there are plenty of nice spots to sit and enjoy the lake as the sun goes down.

capitolcreekcircuit-00636.jpg

Day 3: We head over Trail Rider pass and down to Geneva Lake. At the north end of the lake we decide to try the side trip to Siberia Lake I scouted before we left. On the Forest Service topo maps there is a trail here but I had read the trail no longer exists. That’s ok, it makes the side trip more fun.

capitolcreekcircuit-2646.jpg

The first ½ mile alternated between tall grass and shoulder high brush, there are a few faint game trails occasionally to make it a little easier. Once we enter the more forested section it becomes easier to walk up the creek itself for a little less than ¼ mi to the base of a boulder field. The creek has really cut out a gorge here, going up the boulder field to the east is a steep but doable affair. The trail levels off into a narrow meadow with the creek flowing through it. It’s a little marshy but there are a few spots, especially later in the season, that could definitely be doable for a small tent. You certainly wouldn’t be bothered up here. We spend a while chilling in the meadow and decide not to go all the way up to Siberia Lake, another scramble up a boulder field would get you there.

capitolcreekcircuit-2644.jpg
capitolcreekcircuit-00687.jpg

We head back down the boulder field this time starting a little farther east through the woods which wasn’t too bad. Less brushy but more blowdowns to hop over. We get back to the main trail and make camp around Geneva Lake, much more private than Snowmass Lake. The spots are farther apart and much more defined.

capitolcreekcircuit-00724.jpg

Day 4: As we’re breaking camp I grab a trekking pole and think, “this feels weird”. I look down… some little bastard decided to chew through the grips on two of our poles and began to munch on a third. Hell. My guess is a marmot. Here is our quick tape fix. Classy, eh?

capitolcreekcircuit-2659.jpg
capitolcreekcircuit-2663.jpg

After that debacle we walk downhill to the Geneva Lake trailhead, which is accessible only by 4WD and not very busy. From here it is a 2.25 mile walk back up the 4WD road to the Silver Creek trailhead. The roadwalk provides spectacular views south into the Raggeds Wilderness and not much traffic, but the best part is the wildflowers. The entire slope is awash in color as we switchback up it. Turning onto the Avalanche/Silver Creek Trail the flowers refuse to let up and we hike higher into wildflower laced meadows. As we are heading up the pass (our 5th of the trip) we realize we have been circling Meadow Mountain, which couldn’t be more aptly named. Heading down the other side of the pass the terrain changes to a rocky meadow dotted with pine trees.

capitolcreekcircuit-00816.jpg

There are other trip reports that this loop is difficult to follow. I assume people are referring to this section of the trail, which at times is faint/non-existent, but never for more than 100 yards. We didn’t have trouble following it, using our maps and GPS it’s pretty clear where we needed to go to stay in the right direction. Without going off on a tangent let me just say if you’re heading into the backcountry, even on well travelled trails, it’s a good idea to have knowledge of how to use a map, compass, and GPS. If visibility was low this section might have been tougher.

capitolcreekcircuit-00817.jpg

After the meadow the trail stays relatively level just above the tree line at approx. 11,600ft skirting along the east side of the valley for a couple miles and then ascends to just over 11,800ft through a small pass (#6 of the trip). From here the GPS and the National Forest topo maps diverge but there is never any question where the trail is and after a steep descent we make it down to Avalanche Creek. Walking up the creek ⅓ of a mile we end the day at Avalanche Lake.

capitolcreekcircuit-00839.jpg
capitolcreekcircuit-00804.jpg

Day 5: Our final day and our final 2 passes. At 14 miles this will be our longest day, but the lure of a hot shower and a cold beer should be enough to give us the extra push back to the car.

capitolcreekcircuit-00905.jpg

We start the day by walking back down Avalanche Creek .5 mile before turn onto the Capitol Creek Trail. We climb 1,600 ft to the pass which sits at 12,000 ft. Beautiful views of Capitol Lake await us at the top. After the lake the trail descends into the forest and after about 2 miles we head onto the West Snowmass Creek Trail. Here again the GPS and National Forest topo maps are different but the trail on the ground is obvious. Heading up to Haystack pass the trail has been rerouted to stay along the creek for longer before climbing to the pass (the FS map has it following a spur uphill.

capitolcreekcircuit-00916.jpg

Pyramid Peak comes into view as the trees thin and we get to the wide pass (#8 and final!) and take a break for lunch. It’s all downhill for the last 6 miles, through pine and then aspen forest. With 3 miles left to go a light drizzle comes and goes, the only rain of the trip. 1.5 miles from the end we get to Snowmass Creek, the only real creek crossing of the trip. With the early season snowmelt it’s knee deep. After crossing you’ll be tempted to take a left onto an old trail, but the no trespassing signs etc should clue you in you’re going the wrong way. Seems counterintuitive but take a right to find the Geneva Lake Trail. From here the trail levels out and it’s a fast walk to the car.

capitolcreekcircuit-00951.jpg
capitolcreekcircuit-00861.jpg

The circuit was just shy of 46 miles and 14,300 ft of elevation gain. Our side trip on day 3 was an additional 3 miles and 1,000 ft of elevation gain.

If you go:

Buffalo Peaks Wilderness Backpack

I wouldn’t call this loop challenging by any stretch of the imagination and the views are nice but not going to top any “best of” lists for Colorado. But when the more scenic trails are still covered in snow and you’re looking for an easy, pleasant weekend trip it does the trick. You could easily do this route as a day hike too.

The loop is 11.5 miles total with a net elevation gain of ~2,000ft and no steep climbs. It’s located just south of Fairplay, CO. Access is an easy 2WD gravel road.

We did the loop counter-clockwise starting from the Rich Creek trailhead. The trail is a steady uphill for the first 5 miles (most of the elevation gain for the hike) through aspen, pine and then a meadow: the high point of the hike.

2018-Buffalo Peaks Wilderness-00328.jpg

Just after the high point we started looking for camping spots. As you go downhill a small creek starts to form. I suspect as the season goes on this creek dries up. We chose a spot not too far off the trail here amongst the trees about 50 yards from the creek. Turns out there is a more popular (and flat) camping spot about a mile down the trail just before the Tumble Creek trail junction, but the privacy we had was worth it.

2018-Buffalo Peaks Wilderness-00281.jpg

On day 2 we spent the part of the morning looking for the Buffalo Ridge 1470 trail but we couldn’t find the access; it may have been partially under water as the marshy area was full with spring snowmelt. Regardless the area was fun, we saw turtles, beavers and many birds in and around the water.

2018-Buffalo Peaks Wilderness-00302.jpg
2018-Buffalo Peaks Wilderness-00309.jpg

We followed the Tumble Creek trail for the rest of the loop back to the car getting nice views of east and west Buffalo peak along the way. I’d certainly recommend this loop if you’re looking to get away from the crowds and have a relaxing backpacking trip.  

If you go:

Rich Creek TH

Maps: Caltopo / Gaia

USFS Buffalo Peaks information

New Gear Testing

I did an easy two nights out to test a few new items I purchased to lighten my pack on solo trips. The first night was in a steep valley near a river approx 8,200 ft in elevation. Not normally an ideal place to camp given the cold air will sink to the valley floor, but I wanted to see how the gear performs in more humid conditions. Night 2 was above an alpine lake, approx 9,800 ft in elevation. Forecast was for lows near freezing on Night 1 and upper 30s on Night 2. Chance of rain was about 30% each night.

New gear tested:

-Enlightened Equipment Enigma 30F Short/Slim - $265

-Therm-a-Rest Z Lite Sol Sleeping Pad - REI $35

-Outdoor Research Helium II - $65, REI Garage Sale

Night 1

Night 1

Night 2

Night 2

Enlightened Equipment Enigma 30F Sleeping Quilt:

Those of you who know me know it’s pretty rare that I buy new items or drop serious coin on gear (patience is key to finding good deals). However, EE makes amazing gear and when I do buy new I like to support good folks. I love my 20F EE Accomplice for 2 person trips so it was a no brainer to go back to the well for my solo quilt. Night 1 was, as predicted, humid and just above freezing. With base layers and a hat on I was nice and toasty. Night 2 was in upper 30s and much less humid and I slept well without base layers.

For sizing I got the short/slim. The EE site says short is for “5’6” or under”, I’m 5’ 7 1/2” and I find the short to be the perfect size for me. My feet are snug in the footbox and the top of the quilt comes nicely to my chin. The slim size is for “50” or smaller”, I measure myself at 51”. I sleep in a corpse position and like to be essentially swaddled so this works great for me but it’s about the the smallest I’d go. If you’re the type of person who feels restricted in a mummy bag you’ll want a bigger size. The insulation value is in the loft, if the quilt is too tight around you it’s making the quilt less effective.

Fox friend at Lost Lake night 2

Fox friend at Lost Lake night 2

Therm-a-Rest Z Lite Sol Sleeping Pad:

Is it weird that over my many years of backpacking I’ve never used a closed cell foam pad? I’ve always had inflatable mattresses and only once over who knows how many nights have I had to deal with a leak. However, for $35 I figured it was worth a shot, especially since it weighs about the same as inflatables that cost $100 or more. While it’s not as comfortable as an inflatable I like a firm mattress and I slept pretty well. On a longer trip it’d probably get uncomfortable but for a week or less I think it’ll be fine. The best thing was the set up. Just throw it in the tent and you’re done. Amazing. Con was the bulk, I have to strap it to the outside of my pack, but for the cost savings I can deal.

Lost Lake in the morning

Lost Lake in the morning

Outdoor Research Helium II Raincoat:

This piece of gear makes its on to a lot of UL lists. I’ve been eyeing it for a while but at $150 retail you can about guarantee that I’m not going to buy it new. But when I saw one at an REI garage sale for $65 I figured it was time to go for it. On my scale the small weighs in at 5.7oz, a full 10.3oz lighter than my current raincoat (REI Crestrail). The 30% chance of rain never materialized so I didn’t get to put it through its paces but it did work nice as a windbreak layer in the evening.